

Why V-Ray Arch-Viz Renders Are Full of Noise (And How to Clean Them Fast)
V-Ray arch-viz renders look noisy because the image sampler stops before indirect light, dark corners, glass and glossy reflections have enough samples. The fastest clean-up is not rendering longer: add the V-Ray Denoiser, set a moderate noise threshold (around 0.05 is a common starting point for denoised arch-viz stills; V-Ray’s default is 0.01), and use Light Cache for interior bounce light. For animations, denoise in temporal mode to avoid flicker.
Quick Fix: Add the VRayDenoiser render element, render one frame at a 0.05 noise threshold, and only lower the threshold in areas where the denoiser smears texture detail.
V-Ray is one of the most popular render engines for architectural visualization because it creates incredibly realistic images. However, even the best tool can leave you with a common problem: noise, grainy spots in your final image. V-Ray arch-viz renders look noisy because the image sampler has not converged yet, especially in hard areas like indirect light, dark corners, glossy reflections and glass. V-Ray traces sample rays to work out lighting, and when there are too few samples or the noise threshold is set high, those areas stay grainy. Rendering longer cleans it up but burns time, so the fast fix is different.
In this article, Radarrender explains what causes noise in V-Ray and how to clean it up efficiently. We will cover practical settings such as the Denoiser, Noise Threshold, Light Cache Denoise, and Progressive Sampler, so you can get cleaner renders without wasting unnecessary render time.
| Noise Source | Why It Happens | How to Clean It Fast |
| Indirect light / Complex GI | Needs many samples to converge | Light Cache Denoise, post-render Denoiser |
| Dark corners, hidden recesses | Few light rays reach here, high variance | Lower the noise threshold slightly, use Denoiser |
| Glossy reflections, glass | Glossy surfaces demand heavy sampling | Use Denoiser, render with lighter sampler settings |
| Unfinished render frames | Sampler stopped before convergence | Progressive + resumable rendering to resume later |
| Depth of field, motion blur | Blurring requires massive sample counts | Denoiser (supported by defocusAmount element) |
Why is my V-Ray arch-viz render noisy in the first place?
source: sketchucation
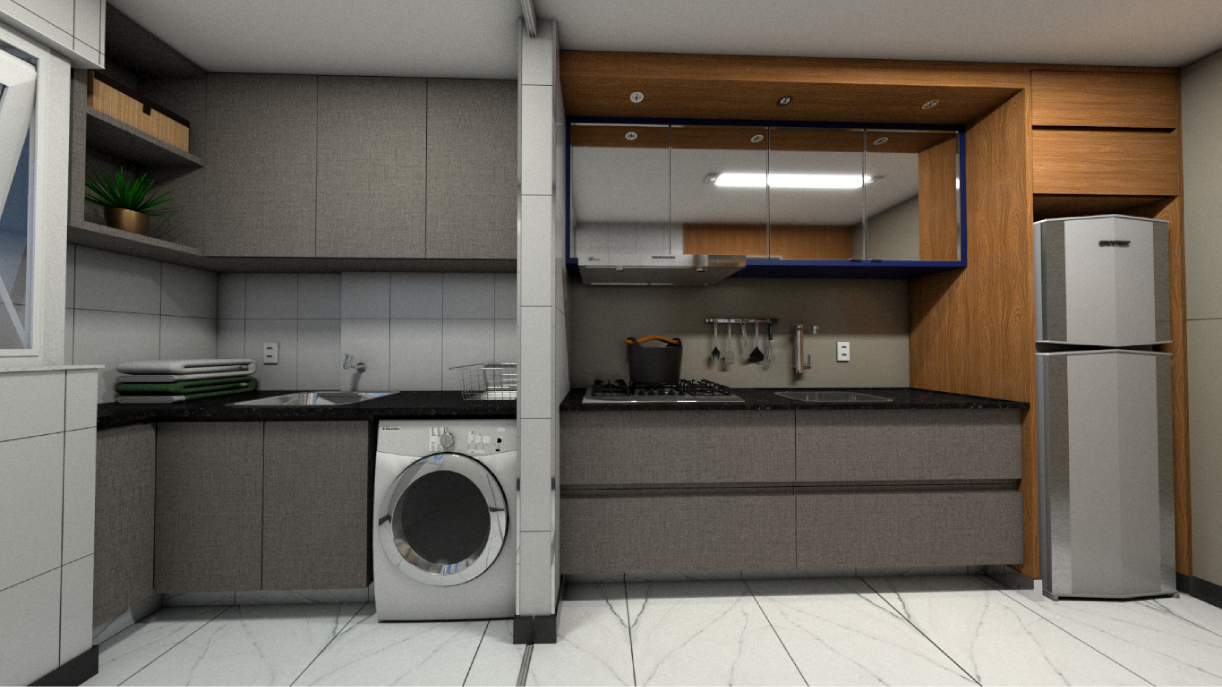
Your V-Ray render is noisy because the image sampler has not finished its job. V-Ray calculates lighting by shooting light rays into your scene, and difficult spots like bounce light, shadows, glass, and blurry reflections need a lot of rays to look smooth. To create an image, V-Ray shoots rays at every pixel until it finds the right color. The noise threshold setting tells V-Ray when to stop. If you set this threshold too high, V-Ray stops shooting rays too early, leaving behind a grainy image. Architectural renders are extra prone to noise. Interior rooms rely on bounce light that hits walls, floors, and ceilings. Dark corners get very little direct light, making them hard to calculate. Glass and glossy materials also bend light in complex ways, creating heavy noise hotspots. If you use the Progressive sampler, V-Ray shows you the whole image right away and cleans it up over time. If your time limit ends or you click stop too early, the render will stay grainy.
What is the fastest way to clean V-Ray noise?
The fastest way to clean V-Ray noise is to turn on the Denoiser and use lighter render settings. Because the Denoiser is made to remove grain, Chaos officially recommends rendering at a lower quality to save time, and then letting the Denoiser fix the image afterward.
When you add the VRayDenoiser element, V-Ray automatically creates extra channels in the background to calculate where the grain is and handle image blurring.
V-Ray gives you three main denoiser engines to choose from:
- Default V-Ray Denoiser: This is a bit slower but gives you the most accurate results and protects fine details.
- NVIDIA AI Denoiser: This is incredibly fast because it uses AI, but you must have a compatible NVIDIA graphics card. Sometimes, it can blur out very small details.
- Intel Open Image Denoiser: This runs on your CPU. It is fast and smooth, but it is not as precise as the default engine.
You can control how strong the cleaning is by using these simple presets:
- Default: A balanced clean for most scenes.
- Mild: A light touch that keeps your original details sharp.
- Strong: A heavy clean that scrubs away big grain but can make the image look muddy. Be careful, as a strong setting can accidentally wipe away architectural textures like wood or stone patterns.
How should I set the noise threshold and sampler?
Set the noise threshold low enough for the denoiser to work well, but not so low that the render takes hours. V-Ray’s default is 0.01, which is clean but slow; when you also use the denoiser, around 0.05 is a common starting point for arch-viz stills with both the Bucket and Progressive samplers.
Think of it this way:
- 0.005 (Too low): The image looks super clean, but render times will skyrocket.
- 0.1 (Too high): The render finishes in seconds, but it will look like gravel.
- 0.05 (Just right): A perfect middle ground. The render finishes quickly, and the Denoiser cleans up the rest.
The Denoiser works best when noise is spread evenly across the entire image. If your noise level channel shows a huge, super-grainy dark patch in just one corner, the denoiser will struggle and create muddy artifacts there. Using the Progressive sampler is very helpful because you can watch the grain fade away step by step. If the image looks clean enough before the time is up, you can simply click stop and let post-processing do the rest.
How do I clean noise for animation and unfinished renders?
For unfinished frames, use the Progressive sampler with resumable rendering to continue from where you stopped. For animations, use the Standalone Denoiser Tool and turn on Temporal mode to stop the image from flickering.
Here is how these tools help you save time:
- Resumable Rendering: If your computer crashes or you hit stop early, V-Ray saves your progress. When you click render again, it continues from that exact point instead of starting over from zero.
- Temporal Mode: Regular denoisers can make animations look weird because noise patterns change in every frame, causing a flashing effect. Temporal mode fixes this by blending the frames smoothly together.
- Standalone Denoiser Tool: This tool runs outside your 3D software (like 3ds Max or SketchUp). You can use it to clean an entire folder of animation frames all at once in just a few seconds.
- Upscale Feature: For fast tests, this renders your image at half size and instantly scales it up with AI. It gives you a quick, clean preview of your lighting changes.
When does hardware or the cloud speed up noise-free renders?
When your scene needs too many samples to look clean and your own computer is too slow, a faster graphics card or a cloud render farm will speed up your work. Since V-Ray is an offline engine, you can use automated SaaS farms or flexible IaaS networks to get the job done.
If you use a V-Ray GPU, render speed depends heavily on your hardware. Powerful graphics cards like the NVIDIA RTX 4090 process light rays incredibly fast. This means your images hit a low noise level naturally before the denoiser even starts working.
| Cloud Provider | Service Model | Best Suited For | Real Strength | Important Consideration |
| Fox Renderfarm | SaaS (Automated per-frame processing) | Massive, high-volume offline render jobs | Built for high-volume batch rendering | Missing the system-level environment control of a dedicated remote desktop |
| GarageFarm | SaaS (Automated per-frame processing) | Automated V-Ray batch rendering | Simple onboarding process and helpful support for beginners | No direct control over the operating system environment; dependent on their supported plugin list |
| iRender | IaaS (Remote machine rental by the hour) | V-Ray GPU, CPU, or hybrid setups with custom plugins | RTX 4090 (24 GB) and RTX 5090 (32 GB) servers; you can install any V-Ray build | Charging continues until you manually shut down the node; initial system setup takes around 15 minutes |
| RebusFarm | SaaS (Automated per-frame processing) | V-Ray CPU and Corona projects | Automated scene manager catches setup errors before you submit | Cannot adjust the backend machine configurations manually |
Suits simpler projects that are finished and only need final frames, using software, versions and plugins the farm already supports.
Suits more complex work: pipelines that depend on custom plugins or specific software versions, scenes you still need to adjust directly in the viewport, and simulations or caches you want to run yourself.
On an IaaS machine you set up and run the session yourself, and billing runs until you shut it down.
iRender rents whole remote GPU servers that you operate yourself (an IaaS model). Its pricing page lists RTX 4090 (24 GB) servers from $8.20 per hour and RTX 5090 (32 GB) servers from $10.80 per hour (checked November 2026) and describes its data center as Tier III (Uptime Institute) with ISO 27001, ISO 9001 and ISO 50001 certifications, and its terms and conditions offer an NDA for confidential projects. The limits: you install and license V-Ray and your plugins yourself, the first session takes setup time, and billing runs until you shut the server down.
FAQ
Why is my V-Ray render full of noise?
V-Ray’s image sampler stopped before the image converged. Indirect light, dark corners, glass and glossy reflections need many samples to look smooth, so if the noise threshold is high or the render is stopped early, those areas stay grainy. Lowering the threshold or adding the V-Ray Denoiser fixes most cases.
What is the fastest way to remove noise in V-Ray?
Add the VRayDenoiser render element and render with a moderate noise threshold rather than a very low one. Chaos recommends combining lighter sampling with denoising to save time. For interiors, Light Cache settings and a denoiser together clean bounce light faster than raising samples alone.
Which V-Ray denoiser should I use?
The default V-Ray Denoiser is the most accurate and keeps fine detail. The NVIDIA AI Denoiser is very fast and suits interactive work on NVIDIA GPUs, but can soften small details. Intel Open Image Denoise runs on the CPU and is a good option without an NVIDIA card. Use the default denoiser for final stills when detail matters.
How do I stop noise from flickering in a V-Ray animation?
Denoise animation frames with the V-Ray Standalone Denoiser in temporal mode, which looks at neighbouring frames so the noise pattern does not change from frame to frame. Denoising each frame on its own often causes flicker in walkthroughs.
Can I continue a noisy V-Ray render instead of starting over?
Yes. With the Progressive image sampler and resumable rendering enabled, V-Ray can continue from the point where a render stopped, adding samples to the existing image instead of restarting from zero.
Related post: V-Ray CPU vs GPU: which render engine should you use?
Part of our guide: for a full overview of cloud options, see the V-Ray render farm guide.
Related reading: Speed vs quality in rendering: when lower samples and denoising are good enough