Step-by-Step Cinema 4D Character Modeling Tutorial
When it comes to 3D design, one of the first and most important steps in creating a 3D animation film is character modeling. Cinema 4D offers powerful tools to help you bring your imagination to life. In this Cinema 4D character modeling tutorial, we’ll walk through the essential steps of building a character from scratch, while also sharing tips that can make your workflow faster and more enjoyable.
Why Use Cinema 4D for Character Modeling?
There are many popular tools on the market today that help you bring your character ideas closer to real life. Cinema 4D has long been a favorite among 3D artists due to its intuitive interface and robust modeling toolkit. Some advantages include:
- Clean, intuitive interface makes it easier to learn compared to other 3D software like Maya or Blender. Beginners can quickly grasp the basics, while professionals still benefit from advanced customization.
- Offers parametric modeling, polygonal modeling, and sculpting tools in one package..
- Parametric and polygonal modeling tools allow flexibility in how you start and refine your models.
- Integration with animation and rigging tools makes the transition from static model to animated character seamless.
- Large community with tutorials, plugins, and asset libraries. Official support from Maxon includes training materials and regular updates.
Cinema 4D Character Modeling Tutorial
Step 1: Start with a Concept
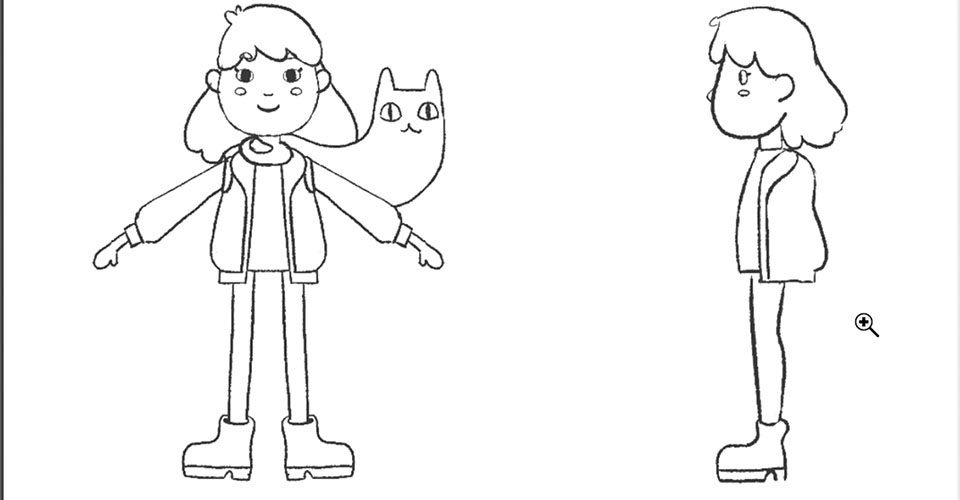
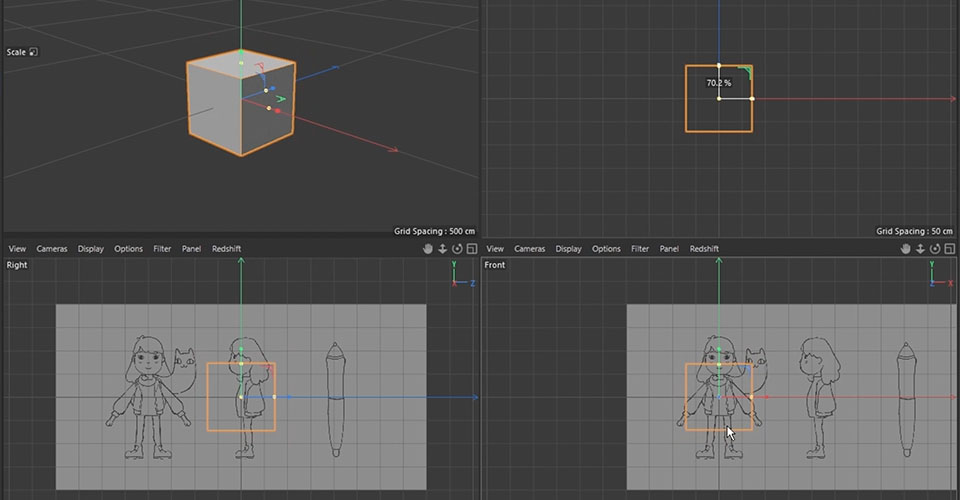
Before diving into polygons, it’s crucial to have a clear idea of your character. Sketch your design on paper or create reference sheets with front and side views. This will serve as a blueprint inside Cinema 4D and keep your proportions consistent.
Pro tip: Import your reference drawings into Cinema 4D’s viewport using the background image option for easy alignment.
 Step 2: Creating the Base Mesh
In this part of the tutorial, we’ll use the Box Modeling technique for the first step. Box modeling is one of the most common 3D modeling techniques used in computer graphics. You start with primitive shapes like cubes, spheres, and cylinders to block out the torso, head, arms, and legs.
Then you can convert primitives into editable polygons (press C) to begin refining. Adjust vertices, edges, and faces using Cinema 4D’s modeling tools until the silhouette of your character matches your reference.
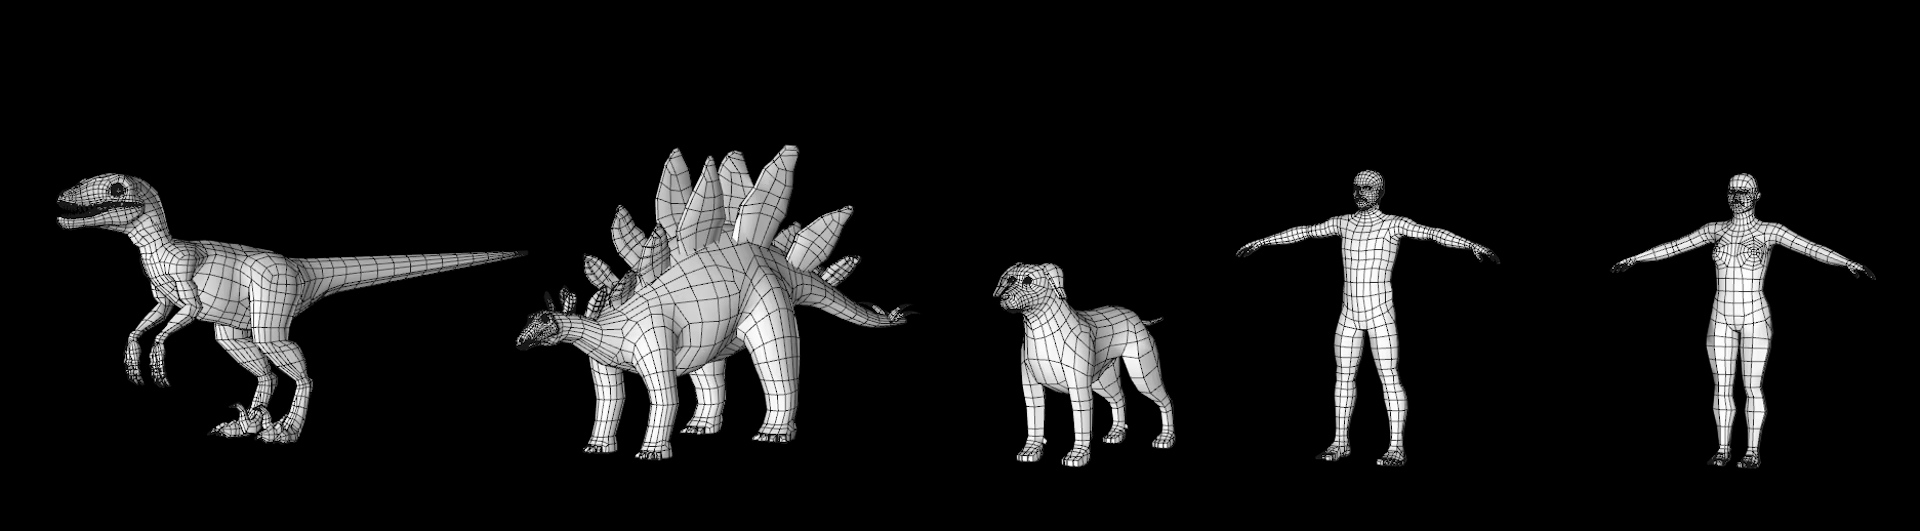
In Cinema 4D, the library’s generic human, animal and dinosaur forms provide a great start for many sculpting projects. Simply double-click any mesh, click Subdivide a few times and start sculpting.
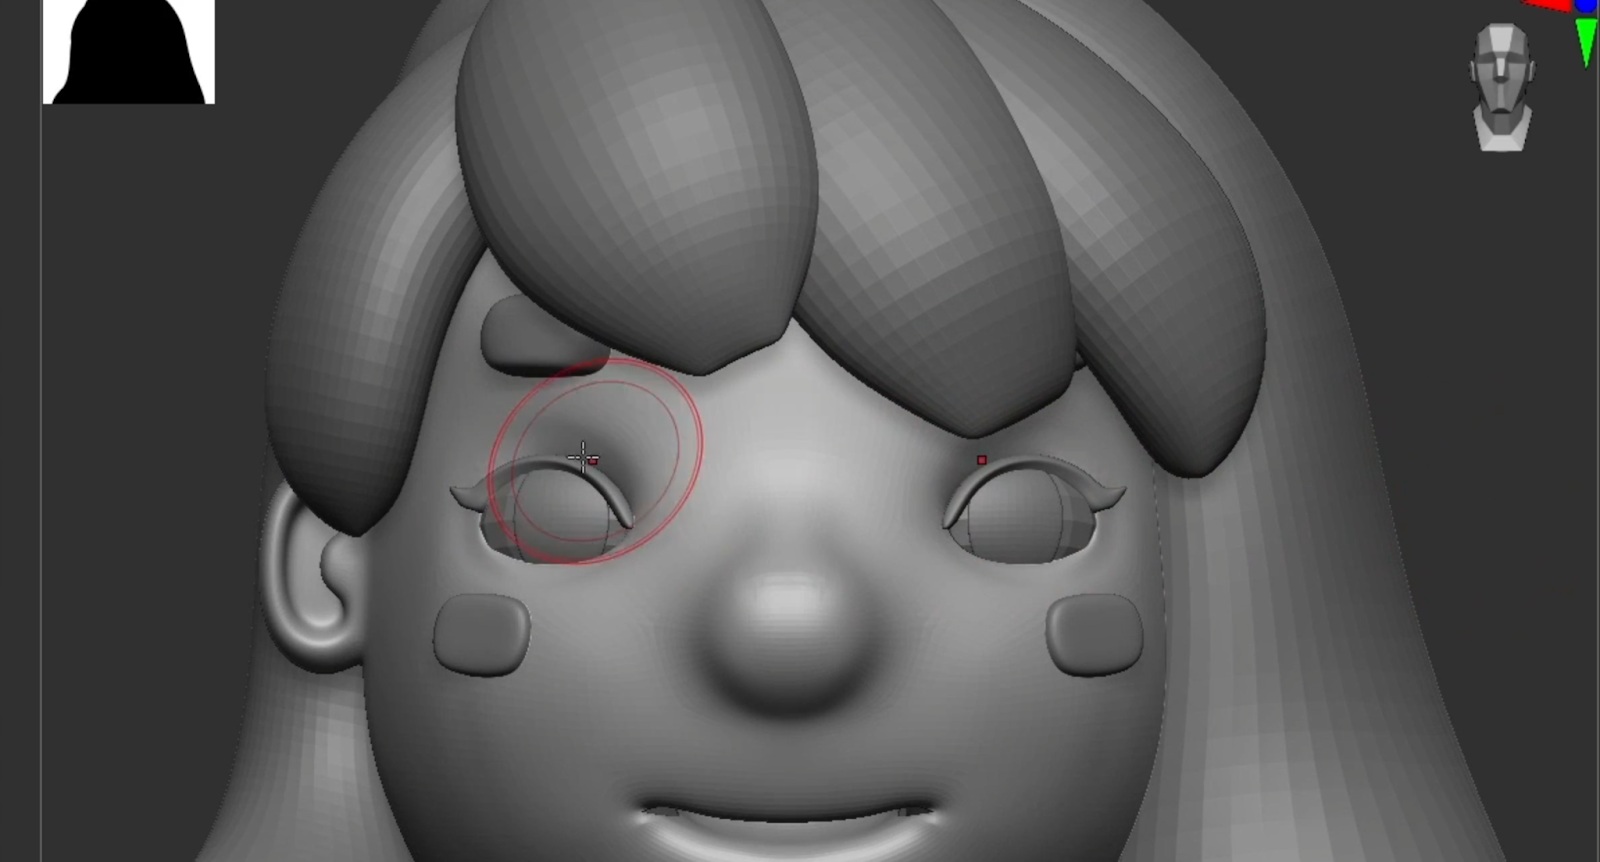
Step 3: Sculpting Details
Cinema 4D’s sculpting tools allow you to add organic shapes and finer details:
- Use brushes to sculpt muscles, wrinkles, or clothing folds.
- Adjust symmetry so edits apply to both sides of your character.
- Start with broad strokes, then move to fine detailing.
If you want more advanced sculpting, you can also integrate ZBrush into your workflow.
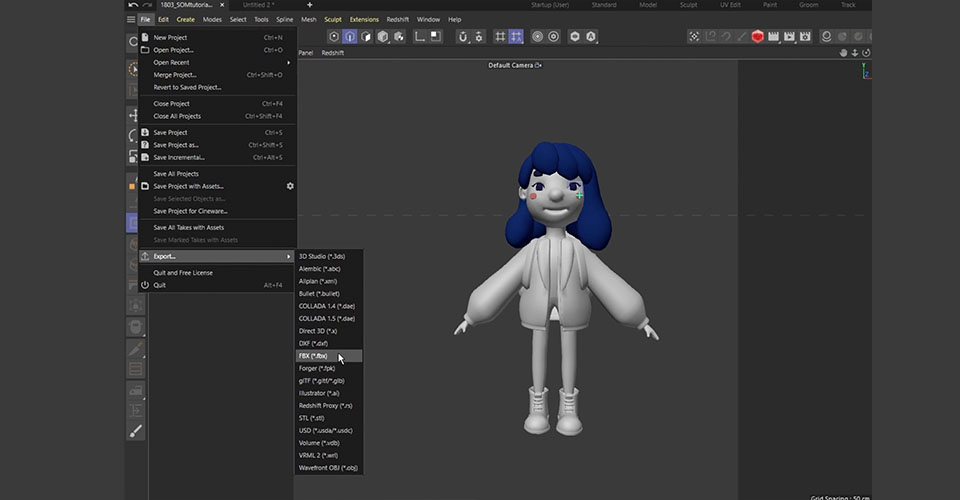
Before we go to ZBrush, we have to prepare files to export. The first thing you want to create is the UV maps. You can make a UV map with ZBrush if you want, but we personally prefer doing this with C4D. You can go to File, Export, and choose FBX file.
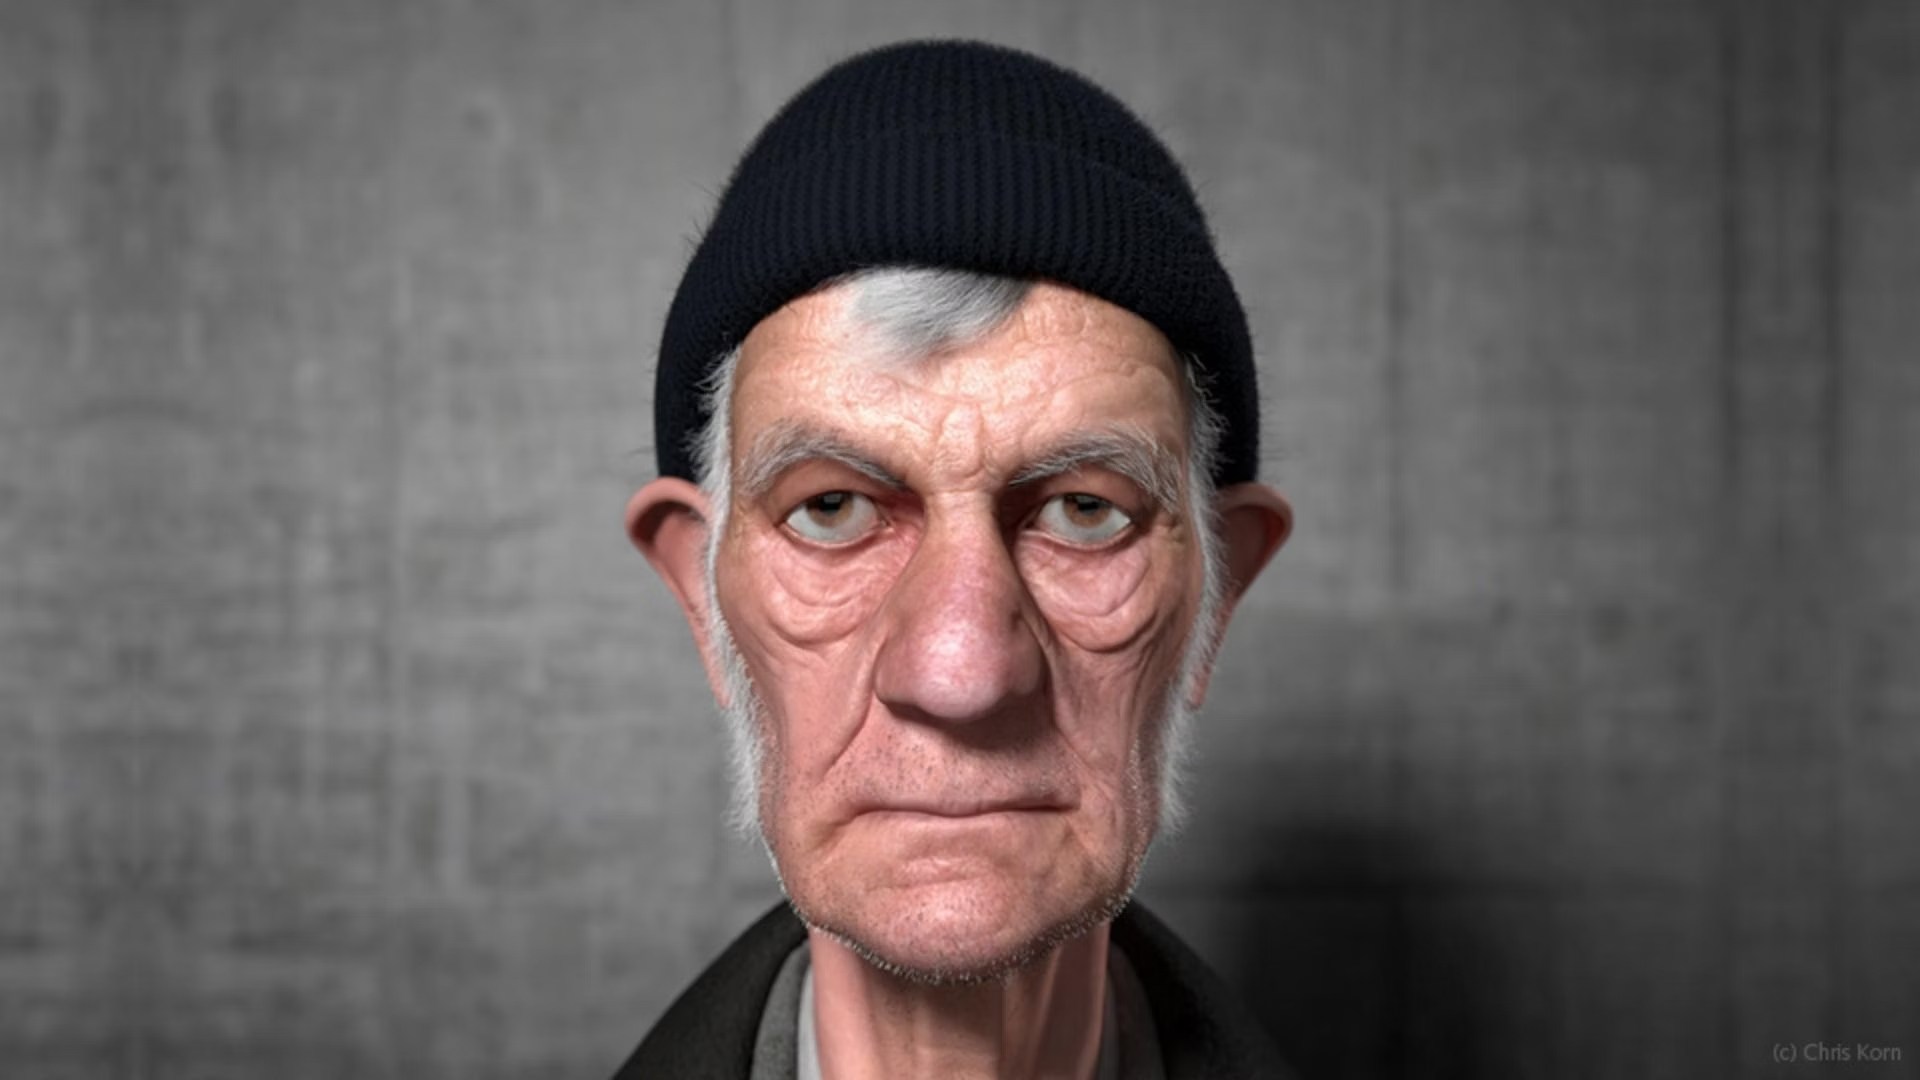
ZBrush is ideal for creating fine details in 3D character design because sculpting often feels more intuitive than box modeling. Instead of worrying about polygon flow, you can simply sculpt in ZBrush as if you were shaping real clay.
To achieve professional results, it’s important to keep your level of detail consistent. For instance, if your character’s clothing includes realistic folds and textures, the face and body should also carry the same amount of realism.
One of the biggest advantages of ZBrush is that you can subdivide your model to sculpt high-resolution details without making your scene too heavy. These details can then be baked into normal maps and displacement maps, allowing you to keep a lightweight, low-poly model in Cinema 4D for rigging and animation while still showcasing all the rich, realistic detail in your textures.
Step 4: Adding Materials and Textures
Now it’s time to bring your model to life with color and texture:
- UV unwrap your character for precise texture painting.
- Use Cinema 4D’s Material Manager to apply shaders.
- Experiment with BodyPaint 3D for hand-painted textures.
- Realistic skin, stylized toon shaders, or metallic armor are all achievable within Cinema 4D.
In addition, you can use Substance Painter to add detailed textures to the characters.
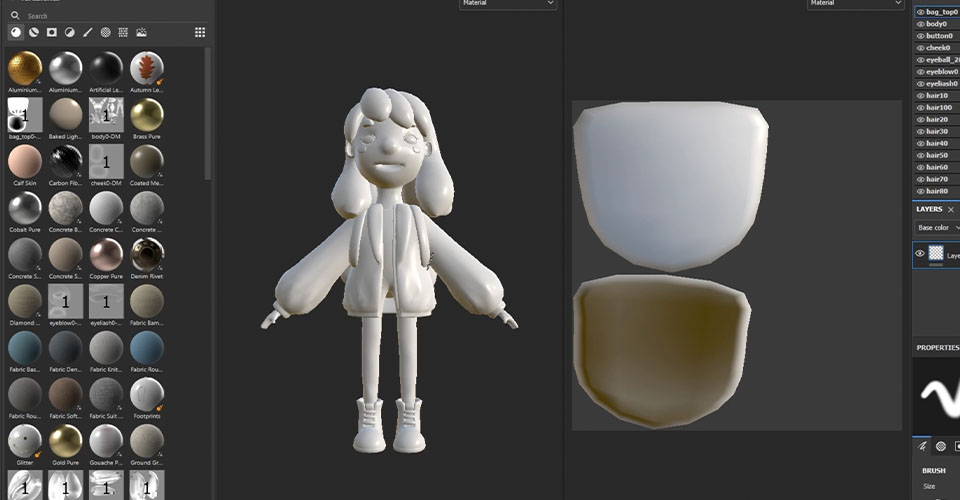
To apply the material, just drag the material you want to use onto the model or layer window. Then you can go to the properties window and adjust the details, such as colors or roughness.
Step 5: Preparing for Rigging
Before animating, your character needs a proper rig:
- Ensure clean topology, especially around joints like elbows and knees.
- Use Weight Painting to fine-tune deformations.
- Add controllers for smooth character animation.
Cinema 4D includes advanced rigging tools that can handle both simple cartoon rigs and complex humanoid structures.
Tips for Beginners
When starting a 3D model, it’s best to begin with the lowest possible polygon count. This principle applies to almost any type of modeling. A dense mesh can slow down your viewport, increase the project’s size, and complicate your workflow.
Equally important is maintaining a clean topology. If you plan to build your character as a single object, clean edge flow will ensure better control and smoother results. This becomes especially critical when preparing your model for rigging and animation, since poor topology can cause unwanted deformations at the joints.
Final Thoughts
Creating characters in Cinema 4D may feel overwhelming at first, but breaking the process into clear steps, concept, blocking, refinement, sculpting, texturing, and rigging, makes it approachable. With practice, you’ll develop your own workflow and style.
See more: V-Ray for Cinema 4D: Tutorial for Beginner
Source images: maxon.net, School of Motion